How to Manually Install WordPress
Here you will find a guide on how to manually install WordPress, in case your hosting does not allow quick one-click installation. If you’re a complete beginner, just follow this guide and you’ll manage it without any problem.
What is WordPress?
WordPress is a CMS (Content Management Software), which allows you to create websites quite easily even if you have no knowledge of programming. Whether you’re creating a personal blog or a website, it’s a great tool that offers a wide range of options to personalize your web presentation using a DRAG AND DROP system, where you basically drag different elements onto the canvas, and they automatically appear on the website.
You can work with WordPress even as an almost complete beginner. If you’re looking for a tutorial on how to create pages using WordPress, you will find a complete guide here….
Advantages of WordPress
- ability to create websites without programming knowledge
- intuitive controls
- easy content insertion
- nice design and thousands of plugins for website functionalities
- and much more….
Disadvantages of WordPress
- more complex tool to run without errors
- more demanding website security requiring advanced knowledge of the WP system
- some services are paid, such as premium plugins
1. Domain Registration
The first step you will need to take is to register your own domain name, which is the unique address of your web presentation. For example,
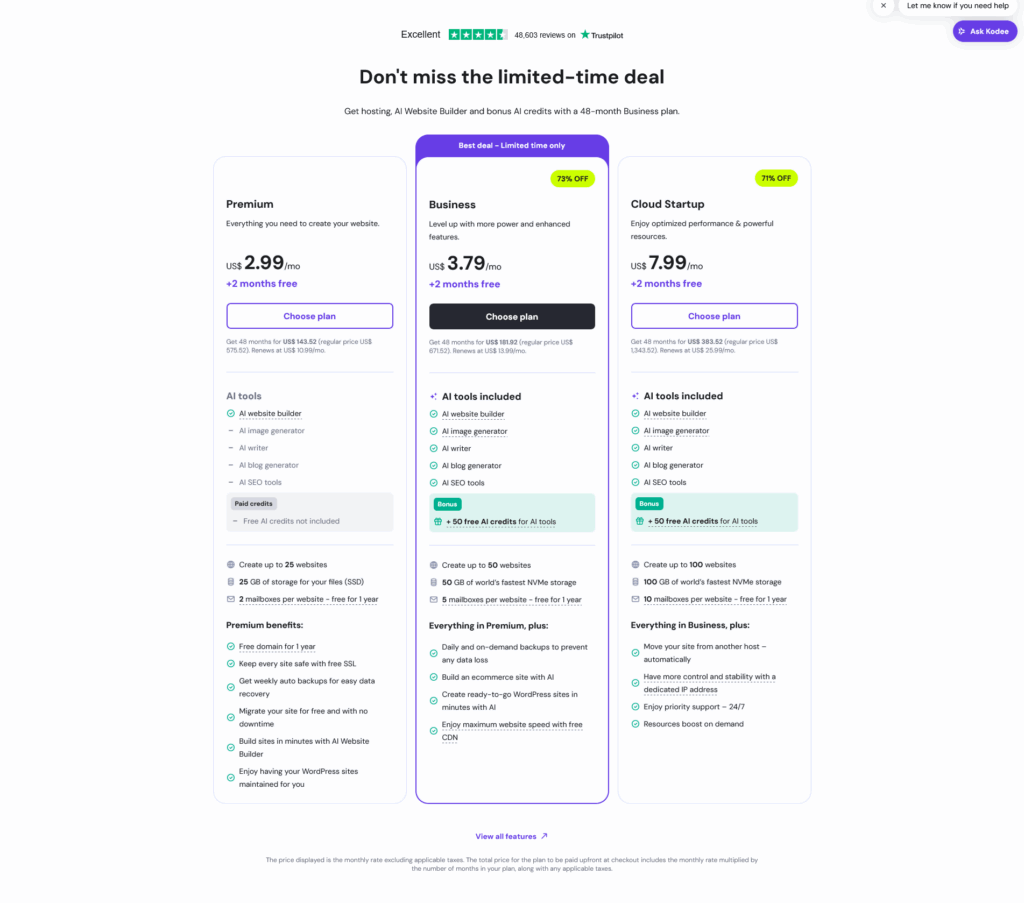
Po tom co budete mít registrovanou doménu, tak je třeba si registrovat HOSTINGOVÉ SLUŽBY, které jsou v rámci HOSTIGER připojené v balíčku s místem, kam umístítě soubory, které generují webové stránky.
Download WordPress.
You can obtain the official WordPress installation package by visiting the main WordPress website. Look for the latest version available for download, typically offered as a .zip archive.
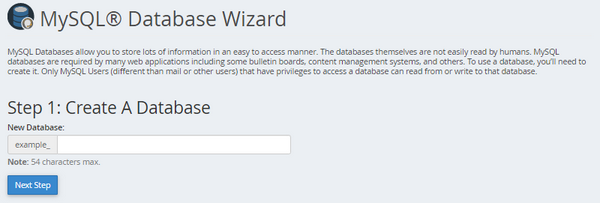
Registr domain and database in your hoting provider.
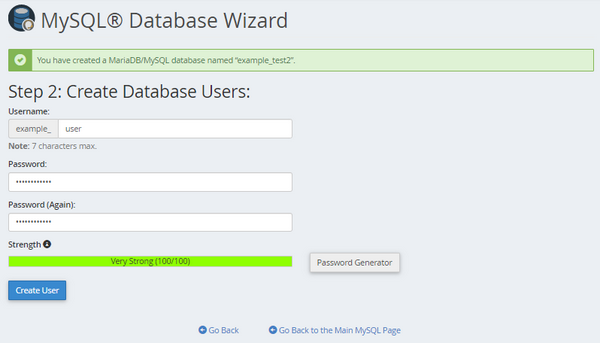
Each hosting provider has a slightly different interface, but look for the section labeled HOSTING, and then navigate to the DATABASES folder, where you can create a new database for your domain. Enter a username and password — you’ll need these credentials later to configure the WP-CONFIG file, as explained below.
Create username and password.
How to modify WP-Config
The wp-config-sample.php file contains the database information and tells the WordPress application from which database to pull data. This step must be completed to ensure the correct database information is associated with the WordPress installation.
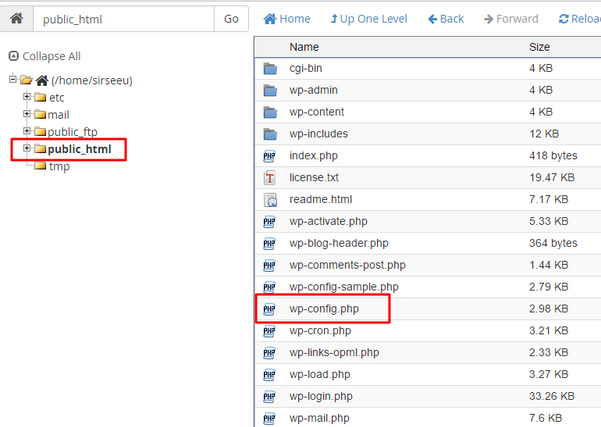
The wp-config-sample.php file can be found in File Manager in the folder where WordPress is installed. The folder for your primary domain is public_html by default, so the steps below show the process for that folder.
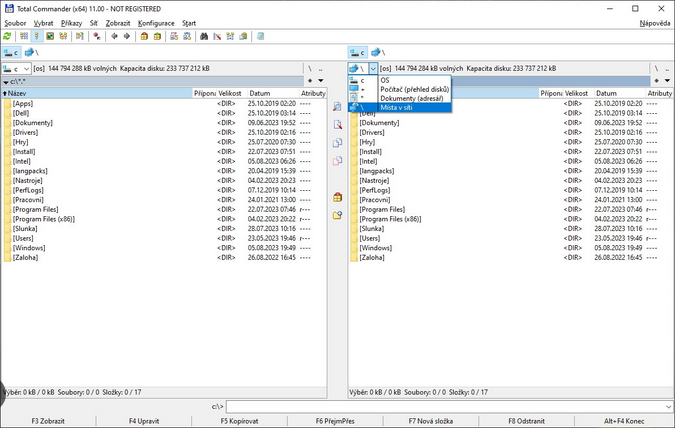
File manager sample
For example, you can use the totalcommander or filezilla . Open you file manager and add new connection . Click on the FTP icon in menu, and than add new connection. There you need to add the username, password and url (All this you will get to your email adress, after you registred the hosting) Example: yourdomain.com username: yourdomainc password: ******** and click connect. Than you will se the the file tree structure.
- Within cPanel, navigate to the Files section, then click the File Manager icon.
- From the left-hand navigation menu in File Manager, click public_html. (or WWW file)
- Click on the Settings button found in the top right-hand corner of your File Manager.
- In the pop-up box, check the box for Show Hidden Files (dotfiles), then click Save.
- In the right-hand pane of the File Manager, locate the wp-config-sample.php file.
- Right-click on the file, then select Rename.
- Change the name of the file to wp-config.php, then click the Rename File button to save the change.
- Right-click again on the new wp-config.php file and select Edit.
- A second pop-up box will appear. Click the Edit button.
- When the file opens, look for the following information:
/** The name of the database for WordPress */ define( 'DB_NAME', 'database_name_here' ); /** MySQL database username */ define( 'DB_USER', 'username_here' ); /** MySQL database password */ define( 'DB_PASSWORD', 'password_here'' ); /** MySQL hostname */ define( 'DB_HOST', 'localhost' );- Replace database_name_here with the name of the database you created
- Replace username_here with the username of the database you created.
- Replace password_here with the password of the database that you created.
Run the installation of WordPress
Open a new browser window and enter your domain to run the installation script. Depending on where you installed the script, you will be automatically redirected to either of the following URLs:
If you uploaded WordPress to the domain’s root folder, you should be redirected to:
https://example.com/wp-admin/install.phpIf you uploaded WordPress to a subfolder of your domain’s directory, then the URL will be this format:
https://example.com/yoursubfolder/wp-admin/install.php
Complete the installation
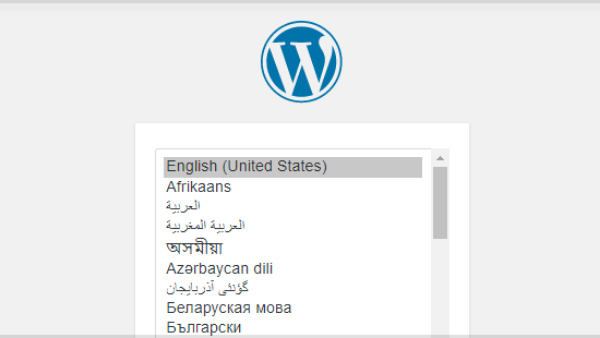
Once you access your correct WordPress URL in a browser, you will see a WordPress setup page prompting you to select your preferred language. Select your preferred language and click the Continue button.
You should now see a welcome page that says, “Welcome to the famous five-minute WordPress installation process!” Under the Information needed section, you’ll need to fill out the following fields: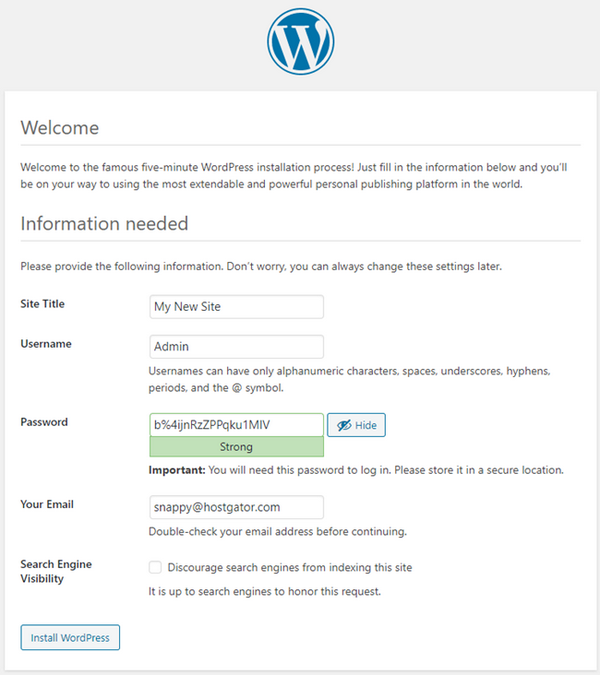
- Site Title – This can be changed at a later time.
- Username – This is the admin username for the site. We highly recommend using something other than ‘admin’ since using it can pose a security risk.
- Password– A strong password will be automatically generated for you, but you can choose your own. The strength indicator will let you know how secure your password is.
- Your Email– Login information will be sent to this email address, so make sure it is an email address you have access to.
- Search Engine Visibility– If you want your website to show up in search engine results, leave this unchecked. If you do not want your site indexed, then you can check this box.
Click the Install WordPress button, and you should be taken to the final screen, which says, “WordPress has been installed. Thank you, and enjoy!”. It will display the username you chose on the previous page and a placeholder for your password. Click the Log In button to log in to the WordPress Admin Dashboard to begin building your site!
